

The default printer set in windows
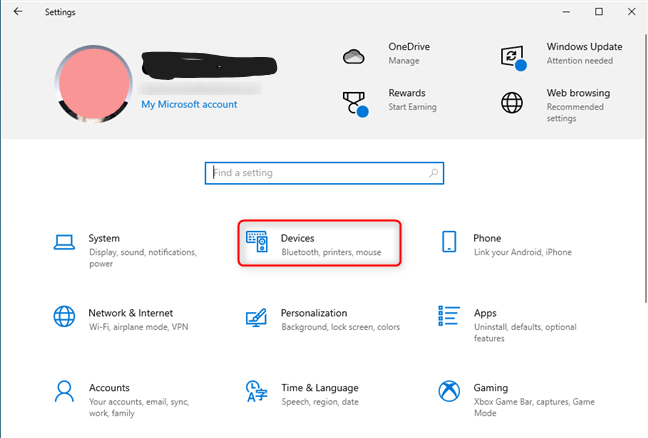
In Windows10 Settings, go to Devices
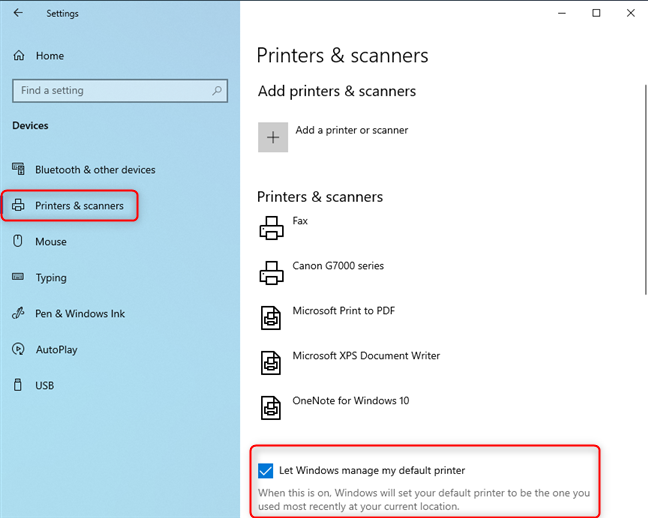
Go to Printers and scanners
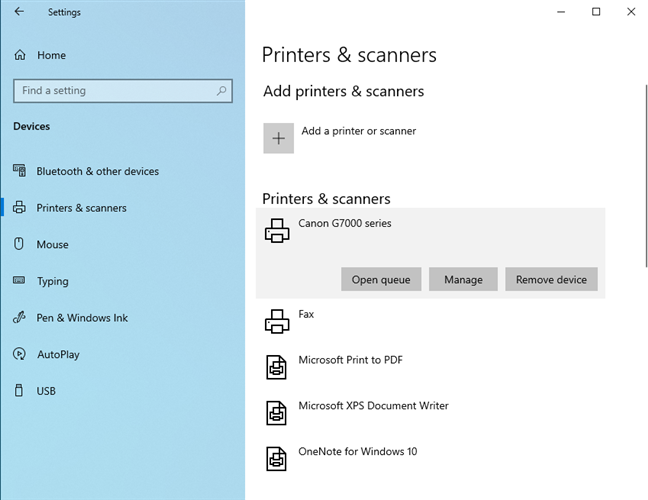
Select the printer you want to use, and click or tap Manage
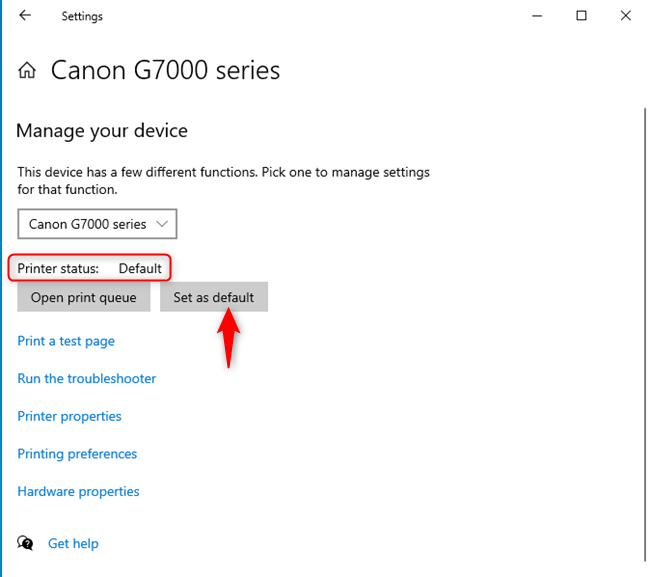
Click or tap Set as default
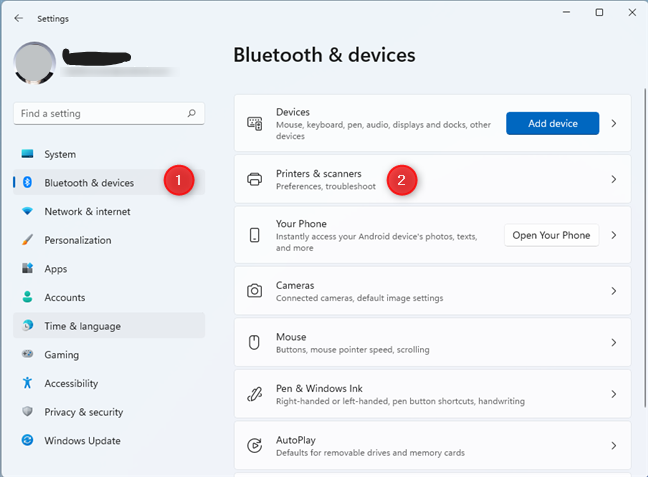
In Windows 11 Settings, go to Bluetooth & devices
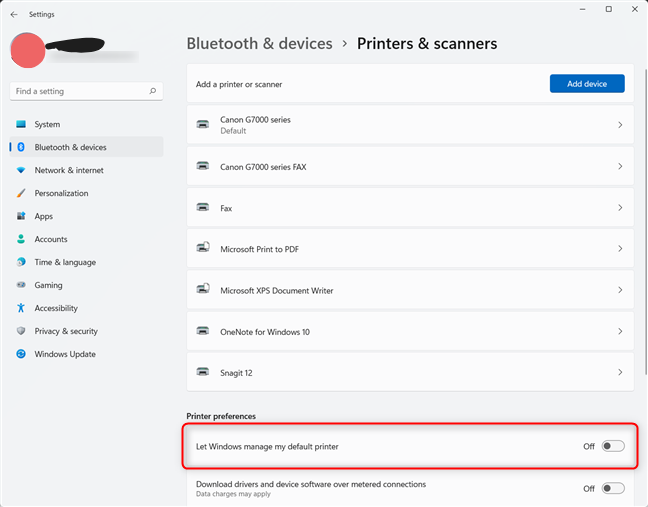
Set the Let Windows manage my default printer switch to OFF
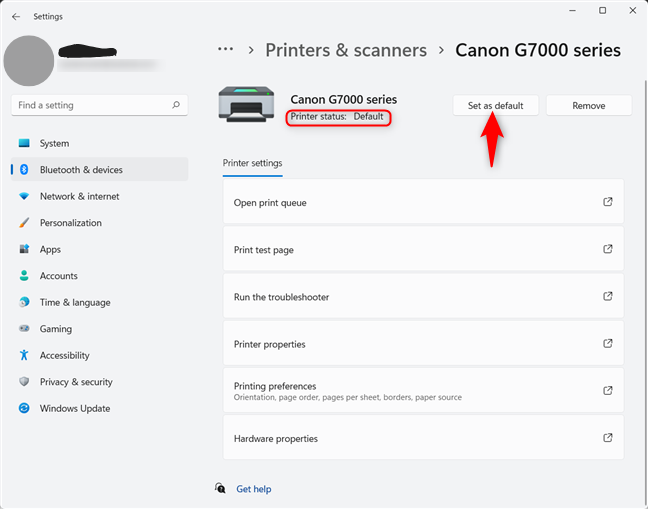
Click or tap Set as default
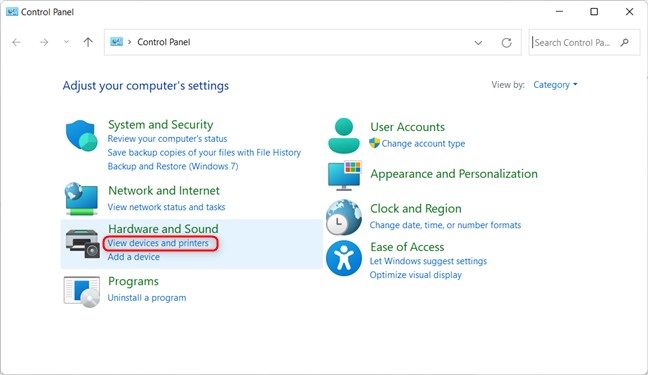
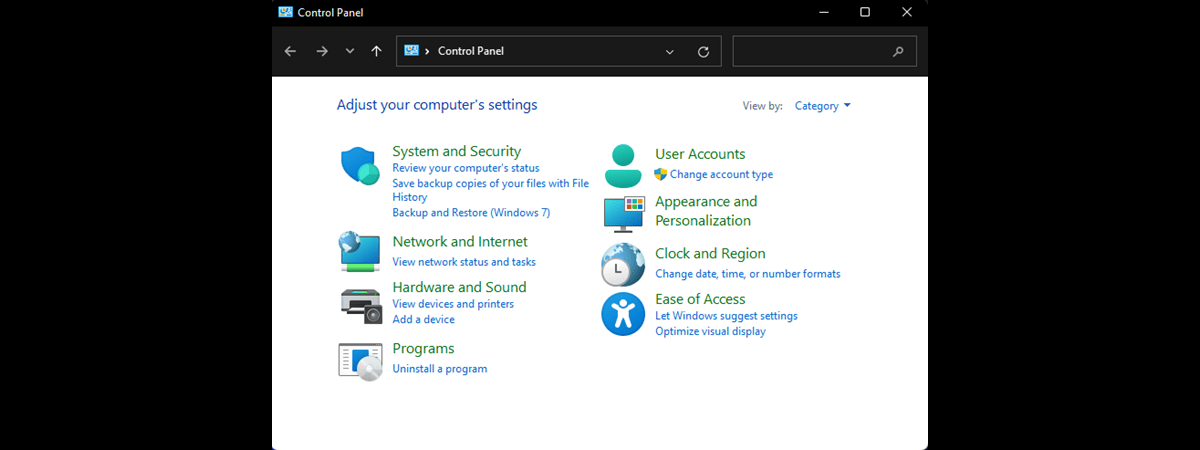
In Control Panel, click View devices and printers
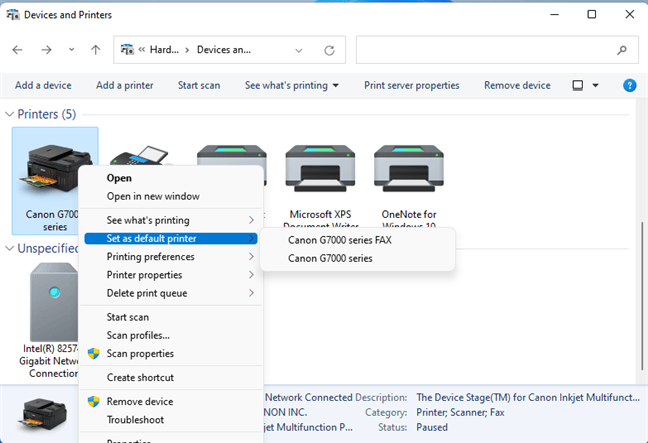
Right-click the printer you want as the default
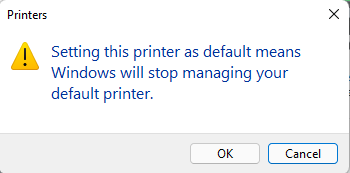
Confirm your choice
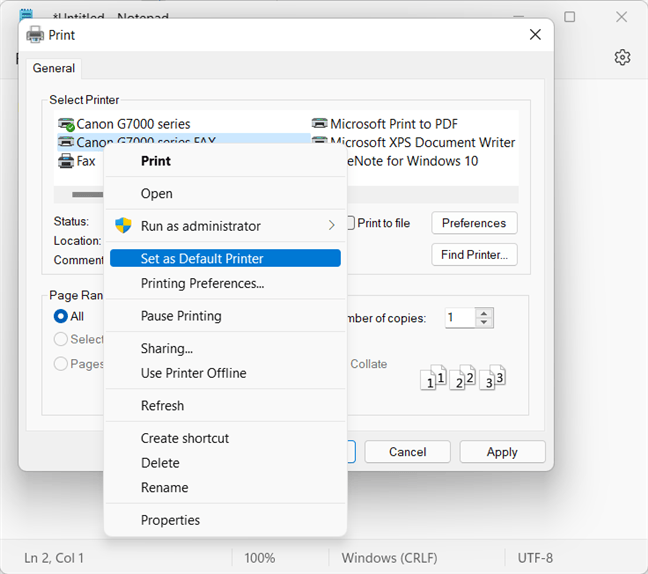
Set the default printer from the Print window
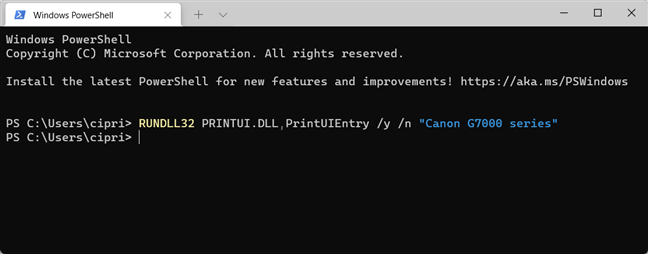
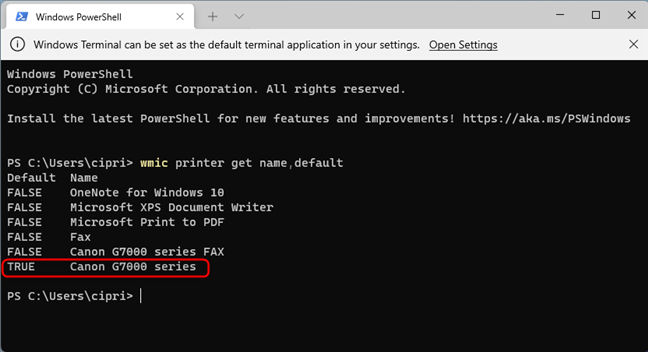
The command to set the default printer in Windows


Leave a Reply