

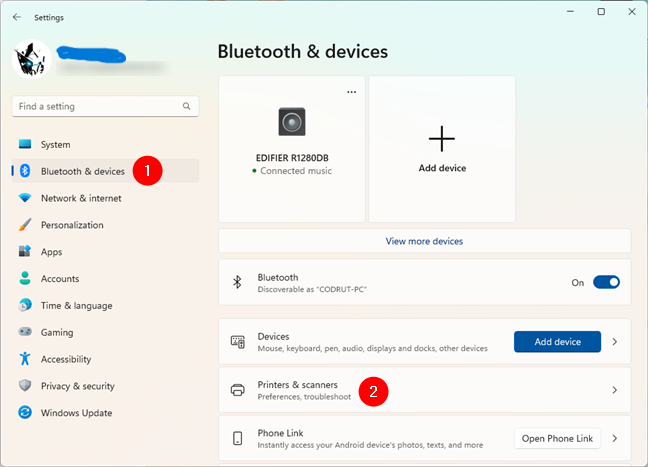
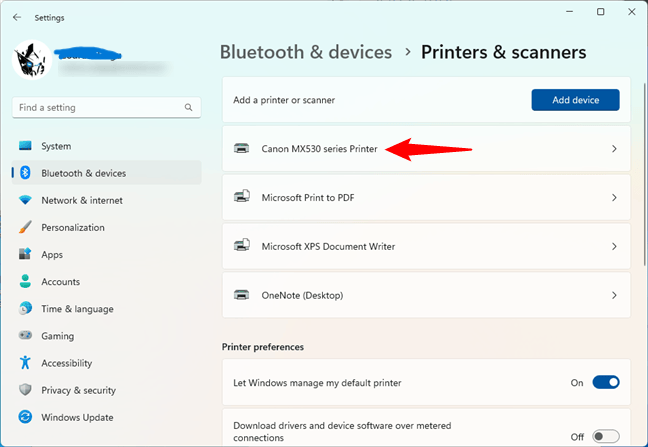
Go to Bluetooth & devices > Printers & scanners in Window's 11 Settings
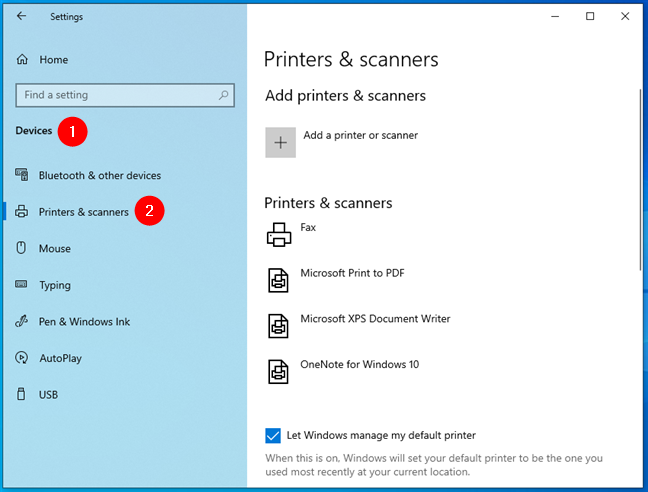
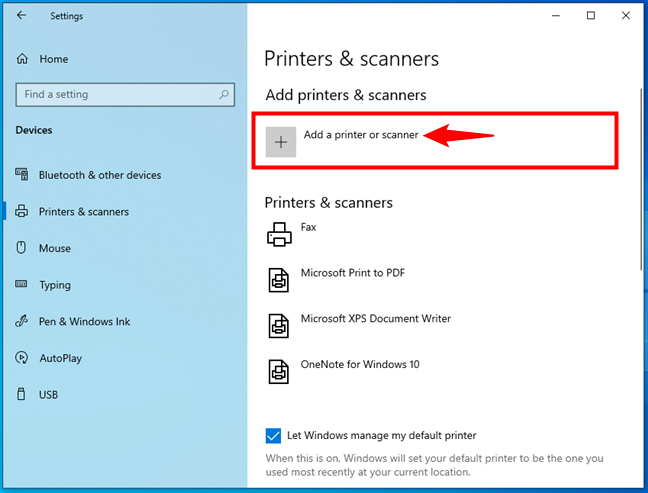
Go to Devices > Printers & scanners in Window's 10 Settings
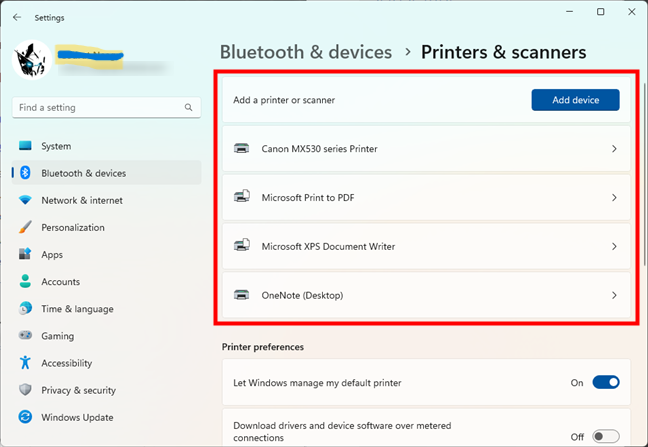
List of printers & scanners installed
A USB printer installed on a Windows 11 computer
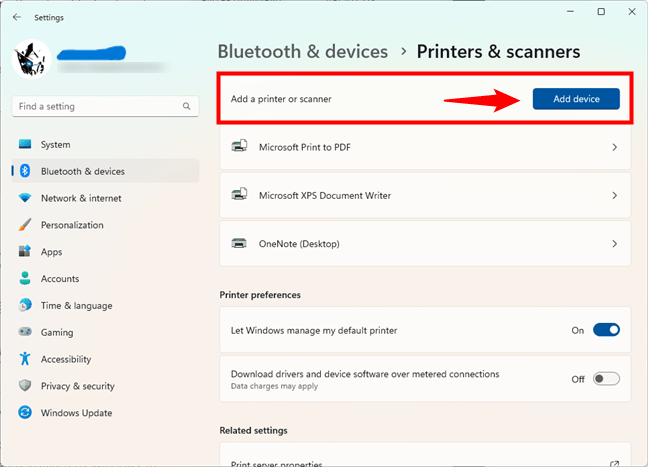
Add a printer or scanner on Windows 11 computer
Add a printer or scanner on Windows 11 computer
The local USB printer has been installed
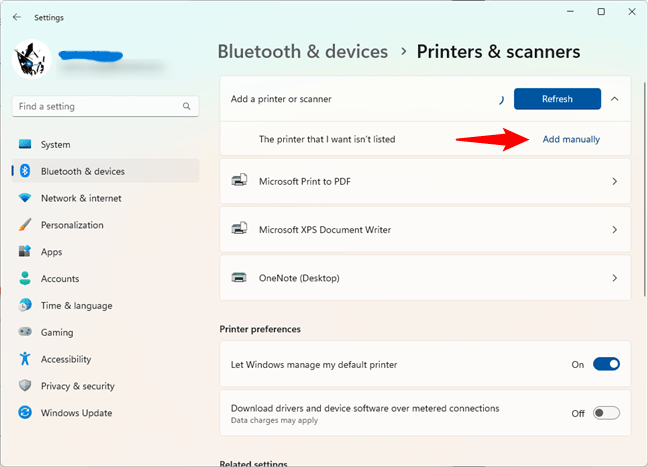
The printer that i want isn't listed in Windows 11
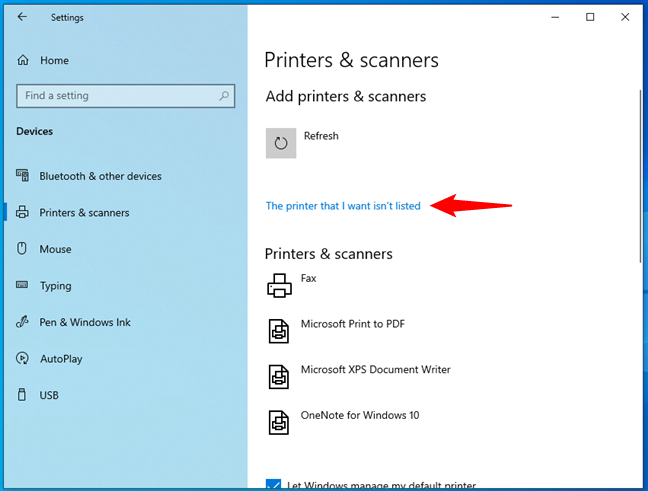
The printer that i want isn't listed in Windows 10
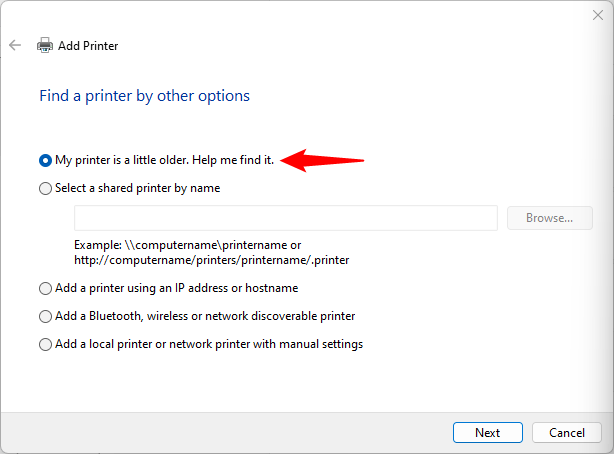
My printer is a little older. Help me find it
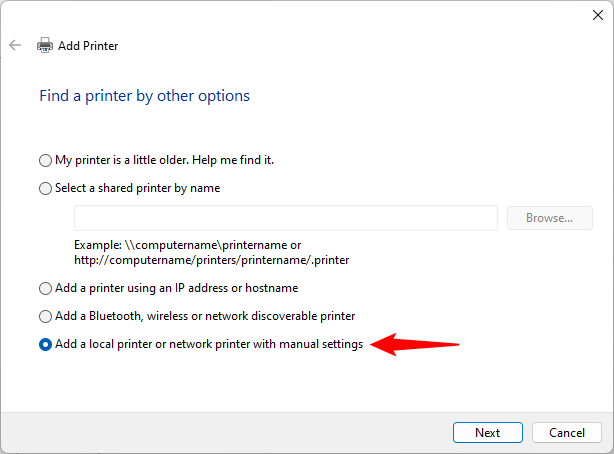
Add a local printer or network printer with manual settings
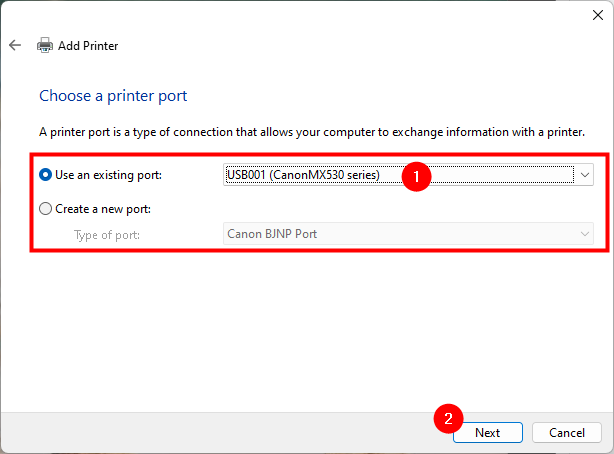
Use an existing port or Create a new port
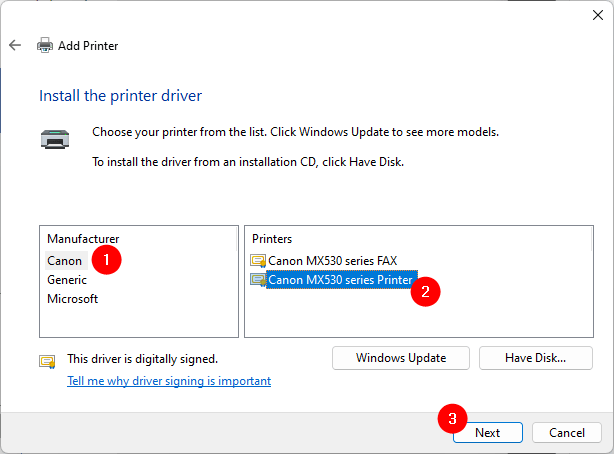
Install the printer driver from a list
install the printer driver by manually selecting the driver's location
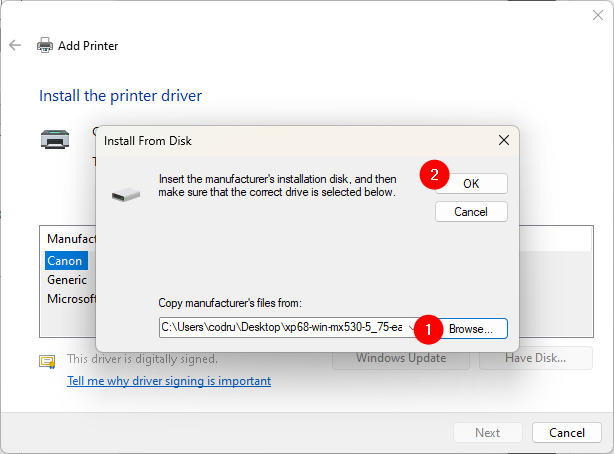
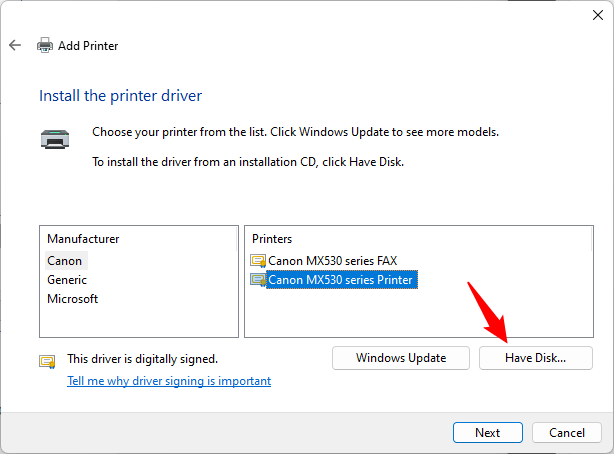
Choosing the location of the printer driver
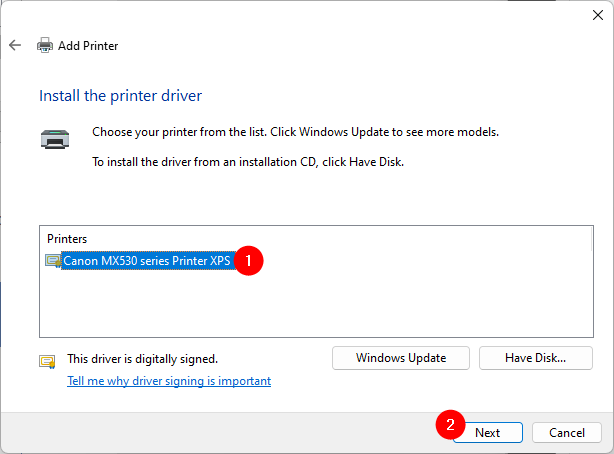
Selecting the printer driver to install
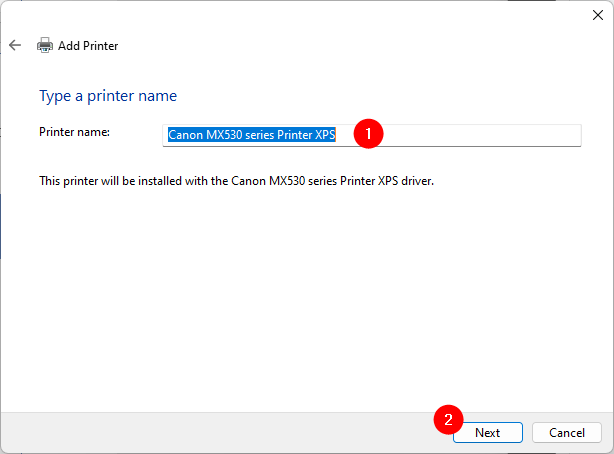
Entering a name for the manually added printer
Choosing whether to share the local printer with the local network
The printer has been manually installed in Windows
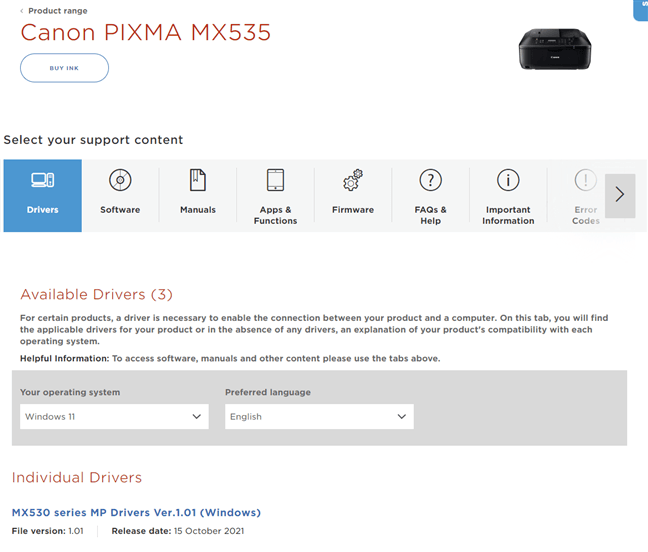
The driver webpage of a Canon printer

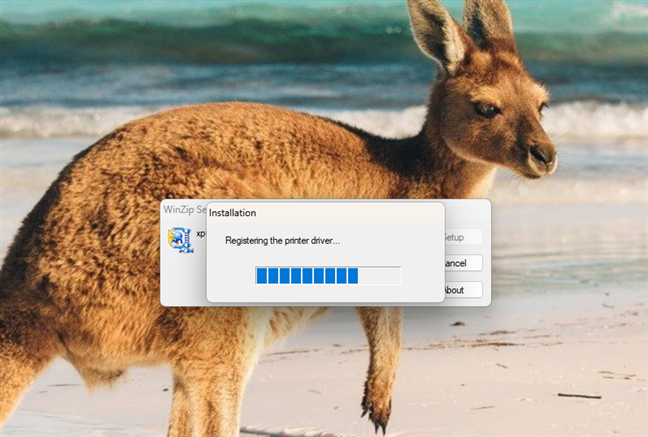
The installation wizard for the Canon printer
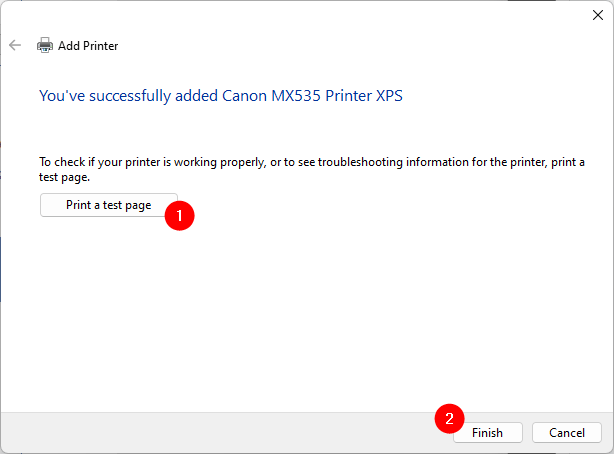
A Canon printer is being added a Windows computer


Leave a Reply